
How Do I Set Up My Canon PIXMA Printer for the First Time

Canon PIXMA printers are easy to use, and their setup process is way easier. However, new users need to learn some prior knowledge and complete instructions to avoid any mistakes. This blog will help you get the A to Z information on all the essential aspects of printer setup. Printers require compatible drivers to communicate with your computer or mobile device. Also, to connect the printer to your phone, you must download the Canon Print inkjet/SELPHY app. If all these things sound like too much, then don't worry; we are here to help you out. You will acquire all the nuts and bolts to set up Canon PIXMA printer.
Download and Install Drivers for Your Canon PIXMA Printer
The first step of the Canon PIXMA printer set up is to download the suitable printer driver on your Windows/Mac device. The following guide will help you download the driver manually.
- On the computer, visit the official Canon support page.
- Next, enter the name of your Canon PIXMA printer in the search section.

- After that, move to the Drivers and Downloads tab and choose the operating system and its version you are using.
- And then, click on the Download option for the driver you want to download.

-
Now, wait for the Canon printer driver download to complete on your device.
The process of downloading the Canon printer driver is quite simple, but some users might not be able to get a suitable driver. In this case, pixmaprinter.com can help you get the right driver for your device.
Apart from that, the website provides free consultations to help you with any printer-related issues. To get in touch with printer executives, head to the Support tab and choose the call or live chat option based on your preference.
The Process to Set up Canon PIXMA Printer on Your Mac Computer
Once the Canon driver download process is complete for your device, then move to the Canon PIXMA printer set up procedure. Here is the stepwise guide to complete the Canon printer setup on a Mac.
- For the first step, connect the Canon printer to a network to which your Mac device is connected.
- Now, open the downloaded driver setup file on your Mac device.
- After that, click on the Start Setup option on the open window. (You may have to enter the password and username before you see this screen.)
- Next, move forward and then the country or region you live in.
- When the Canon Terms and Conditions page appears on the screen, then click on Yes.
- Moreover, choose Agree or Do not Agree based on whether you would like to participate in the survey program.
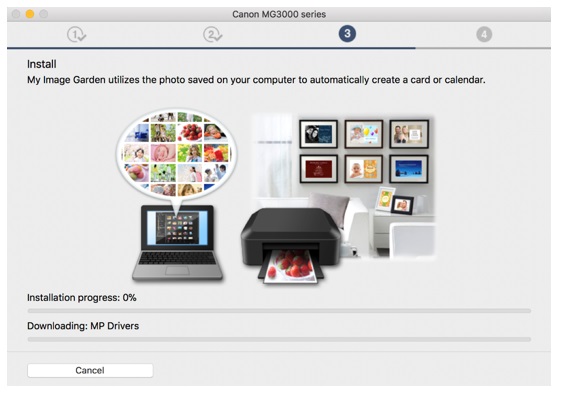
- Afterward, the following screen will show up.
- Now, the Canon driver installation process on your Mac will start.
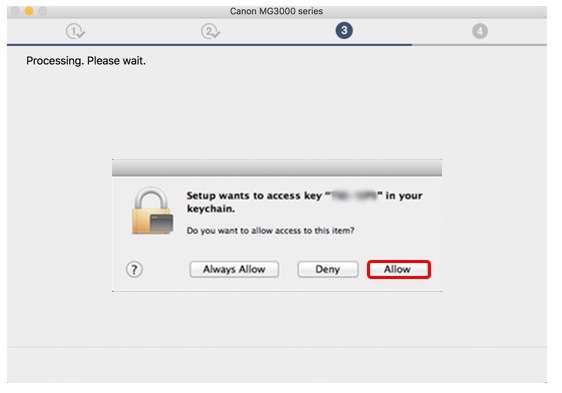
- After that, the Canon software will disconnect your Mac from your wireless network and directly connect to the printer to configure the network settings. (The connection will be temporary.)
- When you see the follow-up screen, then choose Allow.
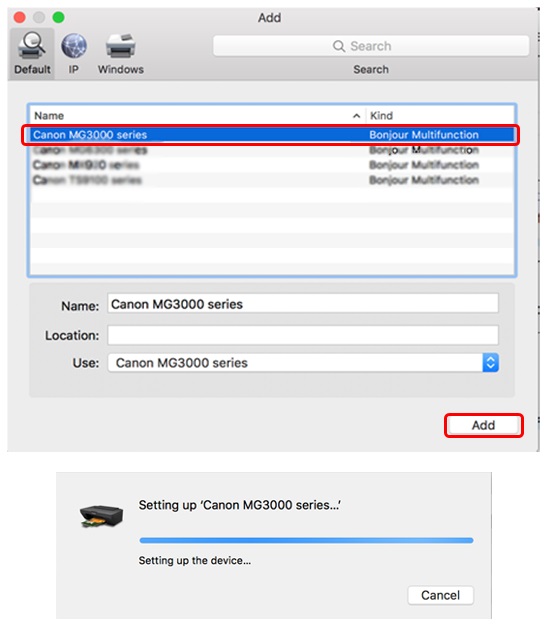
- Moreover, click on the Add printer option.
- From the Canon PIXMA printers list, choose your printer name and click on Add.
-
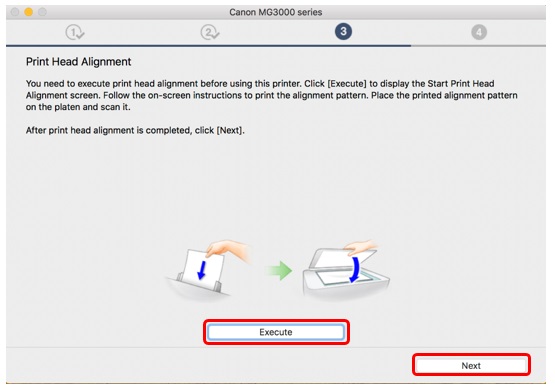
If you are doing the printer setup for the first time, then you need to do the print head alignment. For that, you have to choose the Execute option on the open screen.
- Now, you can choose to print a test page if you want to see everything is fine.
- Finally, the printer setup process will be complete.
The Process to Set up Canon PIXMA Printer on a Windows PC
If you are using a Windows device for the Canon PIXMA printer setup, then follow the steps below to complete the process.
- Turn on the Canon printer and connect it to the same wireless network as your Windows device.
- Then, open the downloaded driver file and then choose Start Setup.
- Now, the software will check for any available driver and software updates. The process can take up to a couple of minutes.
- Choose the country/region and agree with the brand's Terms and Conditions.
- Afterward, choose the option to participate or skip the extended survey program.
- Next, click on the [Deactivate the block] checkbox and select Next.
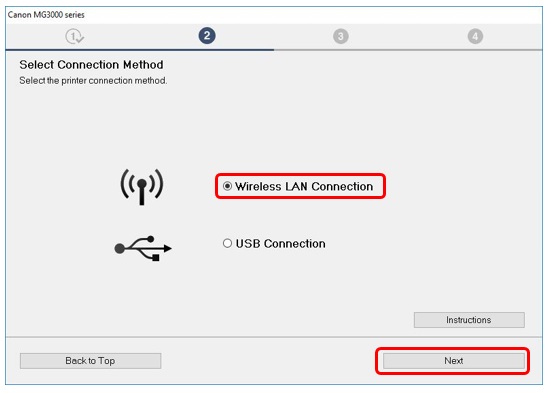
- On the next screen, choose the Wireless LAN Connection radio button and select Next.
-
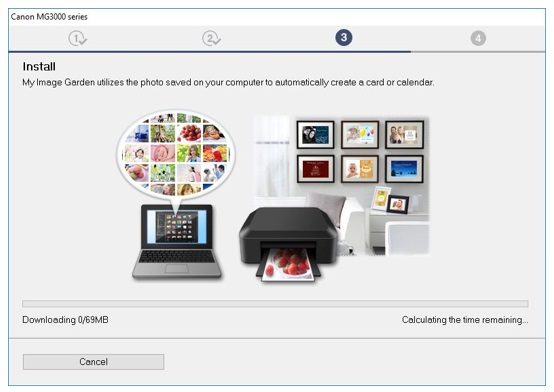
Also, choose the right options to start the driver installation on your PC.
-
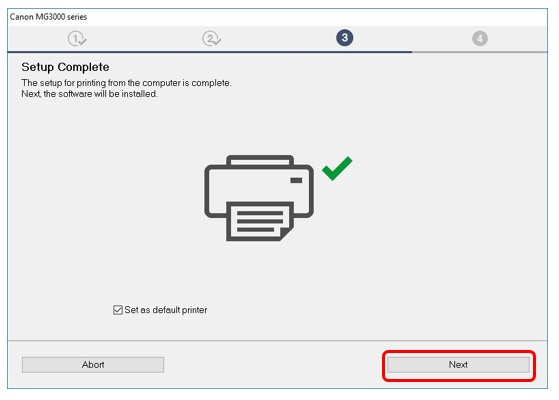
If you are setting up the Canon PIXMA printer for the first time, then click on Execute to perform a print head alignment.
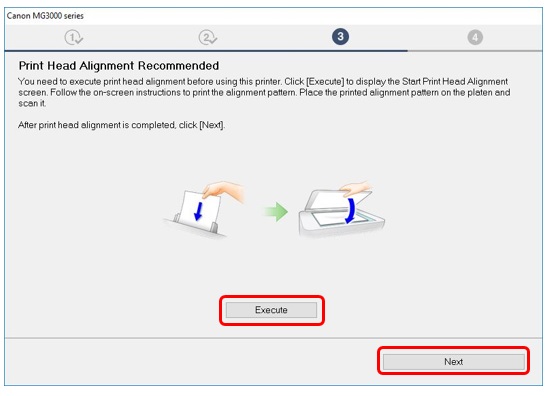
- Again, click on the Execute option to print the first test page on your Canon printer.
- The setup complete window will appear on the screen when the process is complete.
-
Now, enjoy the hassle-free printing experience on your Canon PIXMA printer.
Now, you can use the above guide to set up Canon PIXMA printer quickly. But, if you are facing some issues or want to get additional assistance, then visit pixmaprinter.com. On the website, you will get expert assistance around the clock (24/7). Plus, it offers free consultation via call or live chat in the Support section.
Frequently Asked Questions
Question
How to Set up a Canon PIXMA Printer on Mac?
Here is the correct Canon PIXMA printer set up procedure on an iOS device.
For the first step, connect the printer cable to the socket and turn it on.
Connect your printing device to a wireless network and keep the printer close to your Mac device.
Download the suitable drivers from the official website of the printer brand.
Then, open the downloaded Canon setup file and follow the installation process.
When the machine is connected to your Mac, the setup process will be complete.
Question
How to Set up Canon PIXMA Printer on iOS Devices?
To set the Canon PIXMA printer to an iOS, follow the below guide.
Make sure the printer is on and connected to Wi-Fi.
Then, connect your iOS device to the same wireless network.
Now, open the Apple App Store function on the iOS device.
After that, search for the Canon Print inkjet/Selphy app in the search section.
Please select the right app and download it on your device.
Lastly, open the app to connect the printer to your iOS device.
Question
Why Can't I Set up the Canon PIXMA Printer?
These could be the main reasons why Canon printers are unable to be set up on a device.
The Canon printer and device are not compatible with each other.
Your printer is facing technical glitches in its software.
You do not have the correct driver for your printer.
The printer, router, and computer/mobile are not in the connection range.
You are doing the printer setup wrong and others.
Enter your Comments Here: