
How to Change Ink Cartridges in Canon PIXMA Printer? (Full Guide)
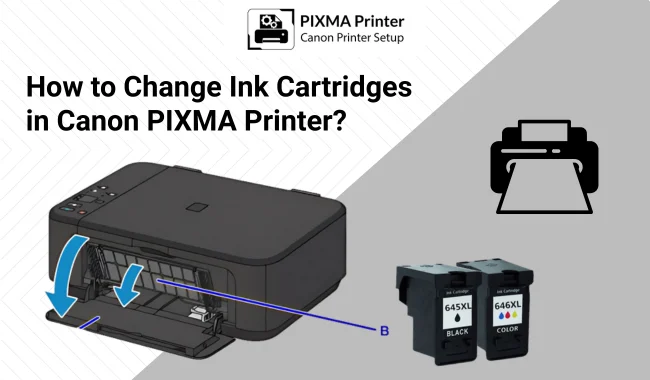

How to change ink cartridges in Canon PIXMA printer as part of routine maintenance? Changing or replacing a printer ink cartridge is essential to ensure high-quality prints. Ink cartridge replacement also keeps the printer running smoothly without any difficulties. Whether you are a new or experienced user of the Canon printer, knowing how to change the ink cartridge is crucial.
Through this blog, we explain a step-by-step process for changing an ink cartridge in a printer and then installing it properly. The guide also gives you some effective tips and tricks to maintain your ink cartridge, which will help you maintain the longevity of your printer. Let’s get started now with a step-by-step guide!
How to Change Canon Ink Cartridges: 5 Easy Steps
Before you start changing your ink cartridge in your printer, make sure that you have a compatible replacement cartridge. You should buy cartridges for your printer’s model only. Once you are ready with your cartridge, you can start following the steps described below:
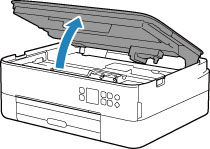
Step 1: Open Printer Unit or Cover
In this step, you will need to turn the printer on and open its scanning unit.
While you open the unit, remember the following points:
- Be careful when you hold the cartridge holder, and be gentle. Don’t try to move it with much force.
- You should also avoid touching the ink cartridge holder unless necessary.
- If you find some ink inside your printer, clean it before touching it.
- Don’t touch any metallic parts within your printer.
- If the scanning unit stays open for over 10 minutes, your cartridge may shift slightly, causing the alarm lamp to illuminate. Hence, close the unit and open it only when required.
Always make sure to keep the above points in mind when you open the unit. Now, let’s head to the second step, where we explain how to change ink cartridges in Canon PIXMA printer by removing the cartridge.
Step 2: Take the Cartridge Out
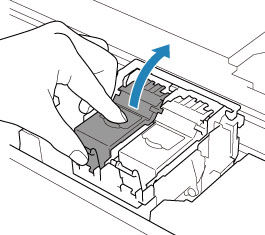
Removing the cartridge from the printer is simple; you just need to lift the cartridge locking cover to remove it. Then, carefully remove any remaining ink from the cartridge.
Step 3: Prepare a New Ink Cartridge
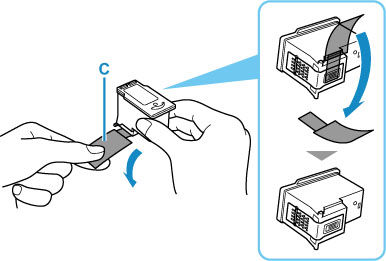
Here, you have to take the cartridge out of its packaging and remove all the protective layer tape.
Step 4: Install Ink Cartridge
Now, we will explain 'how to install ink cartridge in Canon PIXMA printer'. In order to insert the cartridge back into your printer, you have to place it in its holder, i.e., the cartridge holder.
Then, install the color ink cartridge on the left side and the black on the opposite (right) side.

Once you have installed the cartridge, close the ink cartridge locking cover to secure it. Now push the cover until you hear a click sound.

Step 5: Close the Scanning Cover
Before closing the unit cover, hold it once and then close it gently. Watch out for your fingers while closing the cover.
Now, you may have understood how to change ink cartridges in Canon PIXMA printer. You can easily start your printer, but don’t try to perform any operations, as your printer will automatically clean the print head.
You should be waiting for a while, and once the print head is clear, you can start performing any operations that you want.
Effective Tips to Maintain Canon Ink Cartridges
If you want to increase the life span of your printer, follow these tips:
- Use a Branded Cartridge From Canon: Always choose original Canon cartridges to ensure the best quality and performance for your printer.
- Keep Extra Cartridges: Having spare ink cartridges on hand means you won't run out of ink during important printing jobs.
- Clean Print Heads: Regularly cleaning the print heads helps keep your prints sharp and clear, avoiding any smudges or lines.
- Don’t Remove and Reinstall the Cartridge Frequently: Avoid frequent removal and reinstallation of cartridges, as this can cause them to wear out faster.
- Update Printer Firmware: Keeping your printer's software up to date helps it run smoothly and can fix any problems that occur.
- Keep Checking Ink Levels: Regularly checking how much ink is left ensures you won't be caught off guard when it's time to print.
By now, you may have understood 'how to change ink cartridges in Canon PIXMA printer' and get the most out of your printer with those effective tips.
Frequently Asked Questions
Question
How to Check Canon Ink Status on a PC?
Here’s how to check your ink status on a Windows PC:
- Open the Canon printer driver setup on your computer.
- Click on View Printer Status under the Maintenance tab.
- A window
will pop up showing the ink levels for both color and black.
Question
How Do I Check Canon Printer Ink Levels on a Mac?
To check your printer ink levels on a Mac, do the following:
- Open the Apple menu.
- Click on System Preferences.
- Select Printers & Scanners.
- Find your
printer and click on it.
- Choose Options & Supplies.
- Click on Supply Levels to see the ink
levels.
Question
Why Is My Canon Printer Not Printing Properly?
If your printer isn’t functioning correctly, ensure that your ink cartridges are installed properly and that there are no paper jams. Plus, you can try resetting the printer by turning it off and unplugging it for a few minutes before plugging it back in.

Enter your Comments Here: