
How to Connect Canon PIXMA Printer to WiFi?

In a generation where time is everything, wireless printers are useful for all users. These types of printers empower them to print from anywhere without having to stick to any cables. Plus, the ability to connect wirelessly to various devices opens the door to flexibility and easy convenience. However, it can be confusing for a non-technical person to study how to connect Canon printer to WiFi.
In addition, connecting Canon PIXMA printer to WiFi ensures a flawless and stress-free printing experience. Most people prefer to buy this PIXMA series as it eliminates the extra cost of cables or cords. Apart from that, the Canon PIXMA printer is an all-in-one device that can print, scan, or fax. Continuing the blog, we keep our focus on explaining to you the process of connecting the PIXMA series to a wireless network.
Steps to Connect Canon PIXMA Printer to WiFi With WPS
Before starting to connect a Canon PIXMA printer to WiFi, one needs to ensure that their access point has a physical WPS push button. Apart from that, your network must be using WPA or WPS2 security protocol. You need to follow these steps to finish the wireless connection process with ease:
- First, cross-check that your router is within the range of your printer and that the WPS button is all set.
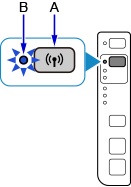
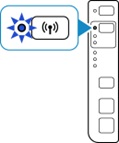
- Next, press and hold your printer A button till the wireless lamp B starts flashing.
-
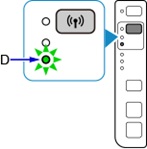
Now, tap the Color button > Wireless till the Direct lamp (D) lights up.
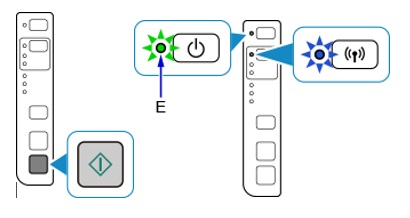
- Following this, again tap the Color button and ensure that the ON lamp (E) and the Wireless lamp flash.
- Afterward, tap the wireless router WPS button within 2 minutes, and the blue WiFi lamp will begin to flash.
- Further, the power and WiFi lamps will start to flash together while connecting to the access point.
- Now, when the connection with both devices is complete, the Power and WiFi lamps will stop flashing.
- Further, both the lamps will remain lit, and the network lamp will also light up.
-
To ensure that you've done all the steps correctly, try a demo printout by accessing the printer.
Do you still require guidance on how to connect Canon printer to WiFi? If so, then get in touch with our qualified experts. You can book a free consultation at pixmaprinter.com or contact them via live chat or call in the Support section.
The Process to Connect Canon PIXMA Printer to WiFi Using Standard Mode
If you have a Windows operating system and need to learn about connecting Canon PIXMA printer to WiFi, then study the steps below. They will make it easier for you to conclude the process within a time frame:
-
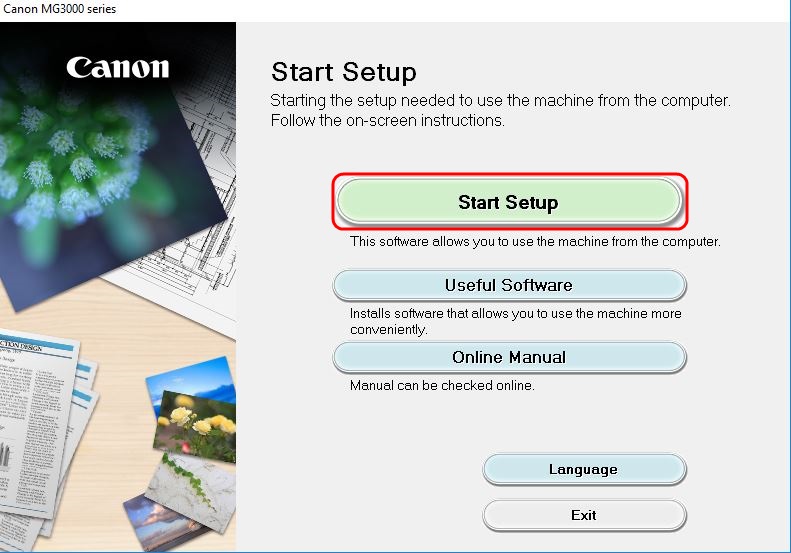
Commence the process by double-clicking the .exe file and pressing the Start Setup option.
- Next, your software will take a few minutes to check for any updates in drivers and software.
- Now, choose your region and country and select the Next box.
- Afterward, read the agreement, and if you agree, tick the Yes option.
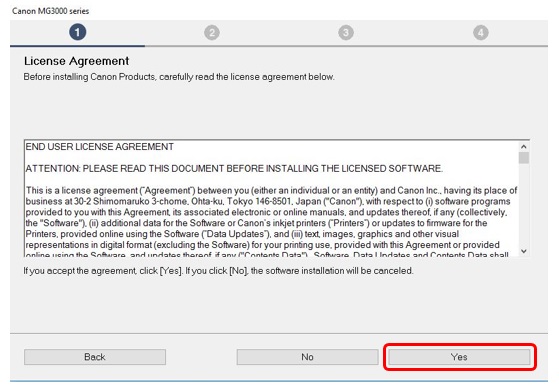
- Besides, if you want to participate in the survey, choose the Agree box or the Do not Agree option.
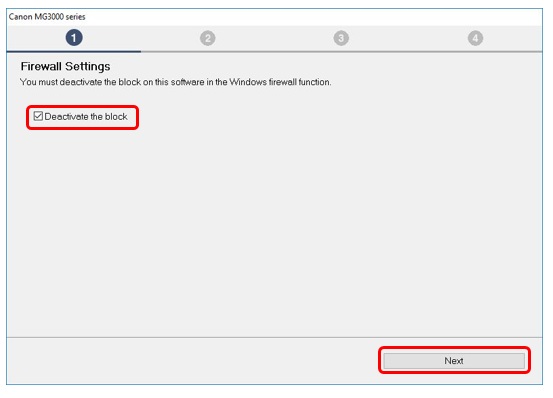
- Further, make sure that the Deactive block is checked and then select the Next option.
- Now, you need to wait till your Canon PIXMA status is getting checked.
- Following this, click the Wireless LAN Connection > Next option.
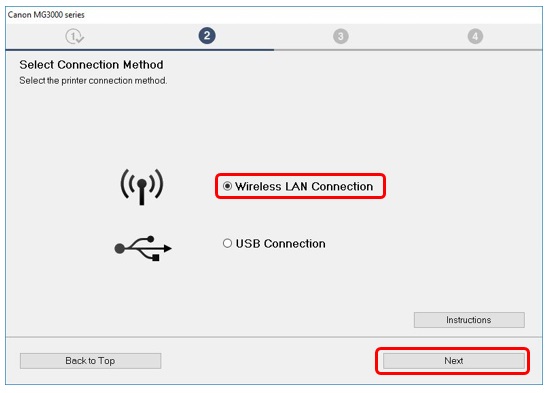
- Next, check that your Canon printer is on, and the software will begin to investigate the nearby network.
- After seeing your printer model, download and install the compatible printer driver on your PC.
- Now, select any additional software from the list appearing inside the pop-up window.
- Next, press Next > Instructions > Next to carry forward the process.
- Further, register your Canon PIXMA model by pressing Next > Skip.
- Finally, tap the Exit option to finish the installation process.
With this kind of information, you might have learned how to connect Canon PIXMA printer to WiFi in these two ways. However, you can also perform the same thing by installing the Canon Print Inkjet/SELPHY app.
Connecting the Printer to WiFi via Canon Print Inkjet/SELPHY App
Equally important, read about connecting a Canon printing device wirelessly with your mobile device by considering the following steps:
- First, you need to confirm that you have a wireless network and your mobile is connected to WiFi.
- After doing this, open the Play Store or App Store and install the Canon Print Inkjet/SELPHY app.
- Now, check your Canon PIXMA printer and make sure it is plugged in and powered on.
- Next, select and grip the WiFi Connect button and wait till the WiFi icon flashes.
- Following this, go back to the WiFi page and start looking for your printer model.
- After getting the name, select it, open the Canon app, and then press the Yes option.
- Further, choose the wireless router type and then note down the password.
- Following this, tap the OK > Yes and wait for some time till the connection process is going on.
- At the end, you will get a message of a connection between devices built successfully.
Finally, you have completed the process of connecting the Canon PIXMA printer to WiFi with the help of the app. Besides, you are most welcome to book a free consultation with our live support agents through pixmaprinter.com. This service is free of charge, or you can contact them via live chat or phone call using the Support tab.
Frequently Asked Questions
Question
How Can I Connect My Canon PIXMA Printer to Mac Wirelessly?
Answer: The below steps will help you connect the PIXMA printer to your Mac via WiFi:
Begin the process by switching on the Mac and Canon printer.
Next, go to Canon's official website and install the driver on your device.
Now, open System Preferences and click the Printers and Scanners option.
After that, select the + icon > choose your printer model > tick the Add.
Further, you have to wait till your device is connected.
Lastly, you will get the message of connection done successfully on your system screen.
Question
How to Connect Canon Printer to Windows 10 Using WiFi?
Answer: Study these steps to learn how to connect Canon PIXMA printer to WiFi:
First, turn on both devices and install the printer driver from Canon's official portal.
Second, press the Windows + R keys and enter control/name Microsoft.DevicesAndPrinters.
Third, press OK and go to the Devices and Printers folder.
Next, press Add printer and follow the instructions to complete the process.
You can test the connection process by doing a test printout.
Question
Why My Canon Printer Isn't Connecting to WiFi?
Answer: There are several reasons why your Canon PIXMA printer won't be connecting to the wireless network. Some of the common reasons are:
Corrupted drivers
Network issues
WiFi network change
However, you can solve these issues by taking these precautions:
Upgrade the previous driver
Reset the Canon printer
Check printer errors
Uninstall and install the printer driver
Enter your Comments Here: